Most remarkable, at least to me, were the ceiling treatments in the house. Too often, a room's "fifth wall" is overlooked...painted white and forgotten. Now, I'm certainly not a fan of painting every ceiling a different color or throwing paint overhead just for the sake of doing it, but this model home had some very striking ceilings. Take a look:
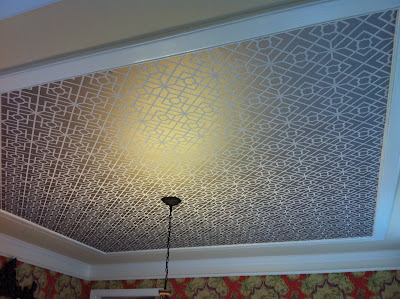
In the dining room, simple flat moldings had been applied about a foot in from the crown to form a frame on the ceiling. They had then papered the ceiling with a shimmery geometric. (It didn't look as dark as the photo makes it appear, was more of a tone on tone) Wonderful, simple idea. Even doing the frame and then painting the center a slightly different tone would be a great idea.
In one of the guest rooms, they had created another frame around the space and then divided it with a large "X" of the same flat molding and painted the ceiling a contrasting color. (I would have loved to see a semi-flush light instead!) This could be done easily by most do-it-yourselfers in a day!
In another bedroom, they had used that same flat molding to create a "headboard" that ran up onto the ceiling. Painted this deep green, it really felt like a traditional bed canopy.
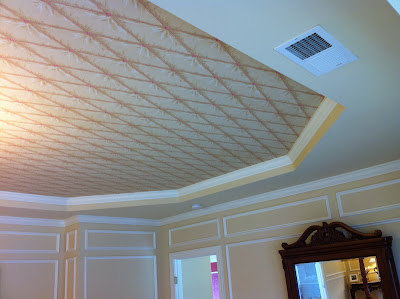
I really liked what they had done in the master bedroom. There was very little pattern, just varying golden hues. The three levels of picture frame molding on the walls was a great idea (and one I may very well be copying!) the only real pattern in the space was this great trellis paper at the top of the tray ceiling.
Nothing new about painting the insets of a coffer, but it worked particularly well to bring this soaring great room "down". Also love their answer to that age old question of how to decorate those big two story walls. Again, they just did some simple framing with stock moldings and paint to create a pretty striking graphic statement. I would think this is another project that could easily be done in a weekend.
So what do you think? Can you see yourself getting crazy with your ceilings? Or maybe tackling one of these molding projects? I think I see a miter saw in my future...
Join us on Facebook!


I love a decorated ceiling and I really like the idea of a faux headboard. A very inexpensive illusion to fabrics and canopies.
ReplyDeleteNicely done!